We have been quite busy recently, especially with Kelsey wrapping up her semester at CSU and caring for ten foster puppies. In addition, the frequent thunderstorms have made it a bit difficult to work. However, we were still able to do a bit of work here and there on the bus!
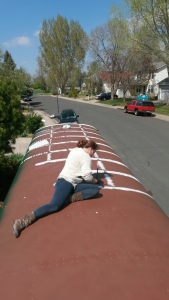
To combat any leaks in our roof, we applied some elasto-metric roof coating a few weeks ago. This totally waterproofed our roof, and it will also provide us with some added reflective-type insulation. We used Henry’s line of roof coating from Home depot, and got one gallon of the gap-sealant (which is like a watery-caulk consistency) and two gallons of the Roof Coat (which is more like a thick-paint). The sealant was quite thick and the bucket said it only covered about 12 square feet, so we only used it where the rivets and the seams were. Doing this, we had enough sealant to completely cover all the rivet heads and cracks- anywhere that water could get in.
We then covered the roof with one coat of the Roof Coat, using a roller. We were only able to get one coat down before the in-climate weather came. We will re-coat the roof when the rain is “forcasted” to hold up for more that 72 hours (like the label suggests)… hopefully that will be soon!
I made a hearth using tile for the wood stove to sit on, over the wheel well. I just threw on a glove, and grouted using my hand instead of buying a float. I came out pretty nice, and it was a lot easier to just use my hand to grout this small area!
We were also able to completely take apart our wood burning stove, clean it out using wire brushes, and re-gasket the seams on the entire hunk of cast iron. It was very easy to do, but very messy. We were both covered in soot from head to toe by the time we were done! We also picked up some black stove paint from the local ranch store, and I was able to spray it onto the stove. I was very disappointed that the finish came out grey, when the can of paint clearly said BLACK on it, but maybe it was a bad batch of paint. We will be returning the can and showing a photo of the finished product to the store… hopefully they can help us get steered into the right direction!
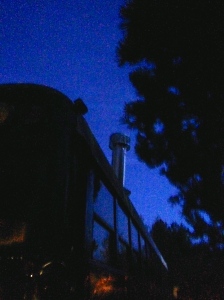
We also fully set up the chimney, using single wall directly above the stove, running into insulated stove pipe through the ceiling and beyond! We were able to use a metal 45degree flashing around the pipe, on the outside of the roof. We will remove the “chimney” when the bus is mobile.
Having fully waterproofed the roof, an endeavor that proved fruitful given all the rain we have recently gotten, we decided to go forward with the ceiling insulation and the installing of the wooden ceiling panels!

However, before we could get to that, we had to frame in the bathroom. In an effort to save space, we “framed” the bathroom with the 2×4’s running “skinny-ways”, instead of the normal 4″ thick wall way. This is OK to do, because the wall is merely for privacy.
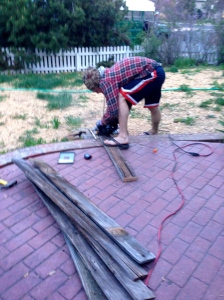
I was also able to collect a bunch of old cedar fence planks for free off Craigslist (yeah!), and decided to use them in the bathroom to give the recycled barn wood/outhouse feel. Most of them were put into the “burn” pile, but many of them we were able to salvage! We still have a few more to put in to fully complete the walls (we will finish it when the ceiling is up), but I think the shiny stock tank looks swell next to the distressed wood!
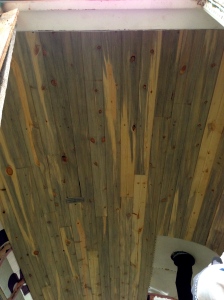
Finally, Today, we started really getting the ball rolling with the Beetle-Kill blue pine ceiling panels! We were able to finish all of the insulation, and put up over half of the panels!! We started in the middle of the bus, running two panels the whole length of the bus… then we worked our way to the sides. In order to keep the ceiling panels strong, but also to keep it looking good, we staggered the wood panels much like you would when installing wood floors. The only hard part was the curve of the bus… we had to loosen some set in panels, in order to get the tongue of the new piece into the groove of the set piece. Other than that, the ceiling panels are quite easy to install!
Thanks for your support, We are sorry that this update was so delayed!!
Cheers!
-Justin and Kelsey


The bus looks wonderful
LikeLike
Thank you!!
LikeLike
You are doing a magnificent job! Lots more to do but now the fun part – trim and design and finish!
LikeLike
I love it!!! Where did you guys get the wood panels from?? it looks amazing!!!!
LikeLike
Thank you!!! The blue stain pine (beetle kill) panels are from Home Depot!
LikeLike
What wonderfully professional work! You guys are amazing!!
LikeLike
Thank you!
LikeLike
Looking real good! How were the panels secured to the ceiling and how are they holding up?
LikeLike
They were secured with wood to metal screws, and are holding up beautifully!!
LikeLike